5. DIS110 Board Dimensions
Use the dimensions below for the mechanical design and assembly.
Info
All dimensions are in mm unless stated otherwise.
Info
Simplified STEP or STP files are available upon request.
Warning
Check the mounting hole positions before you drill. Do not bend or strain the board during installation; this can damage it permanently.
Warning
Use only the mounting holes H1–H4 (red dotted circles, Table.5.1). Plastic nuts and bolts are recommended.
Fig.5.1: DIS110, Board Dimensions (TOP)
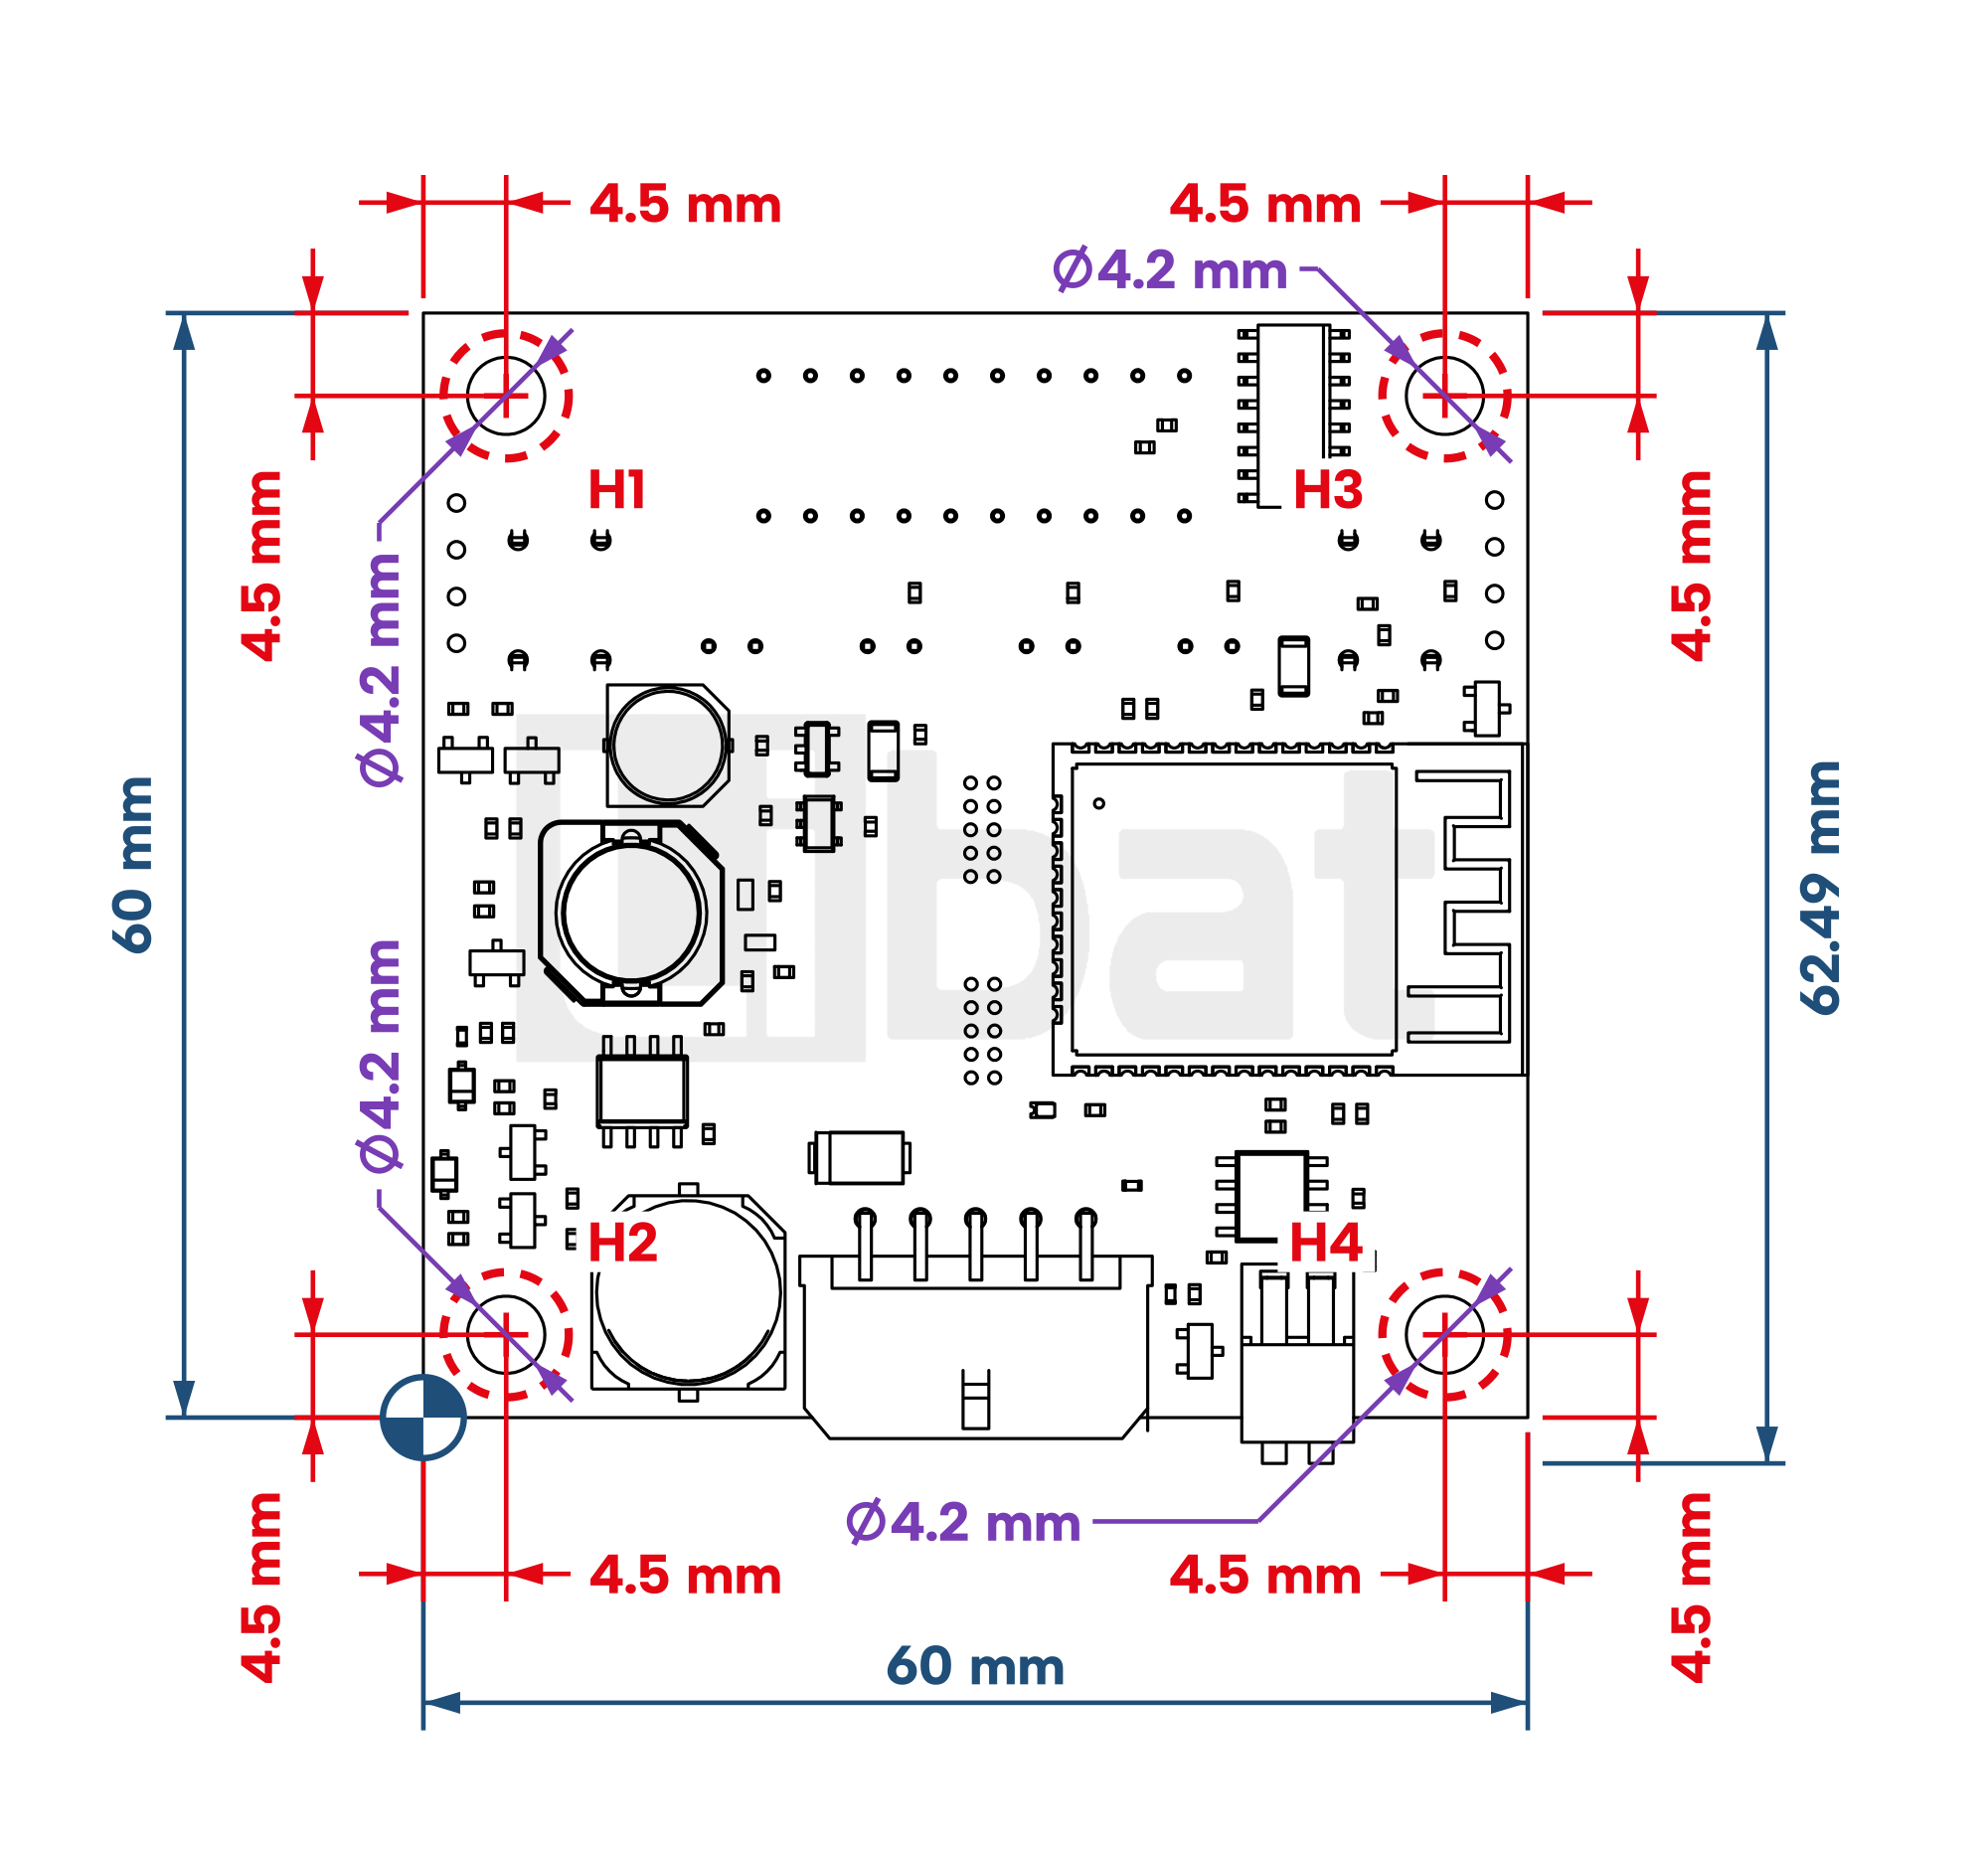
Fig.5.2: DIS110, Board Dimensions (FRONT)
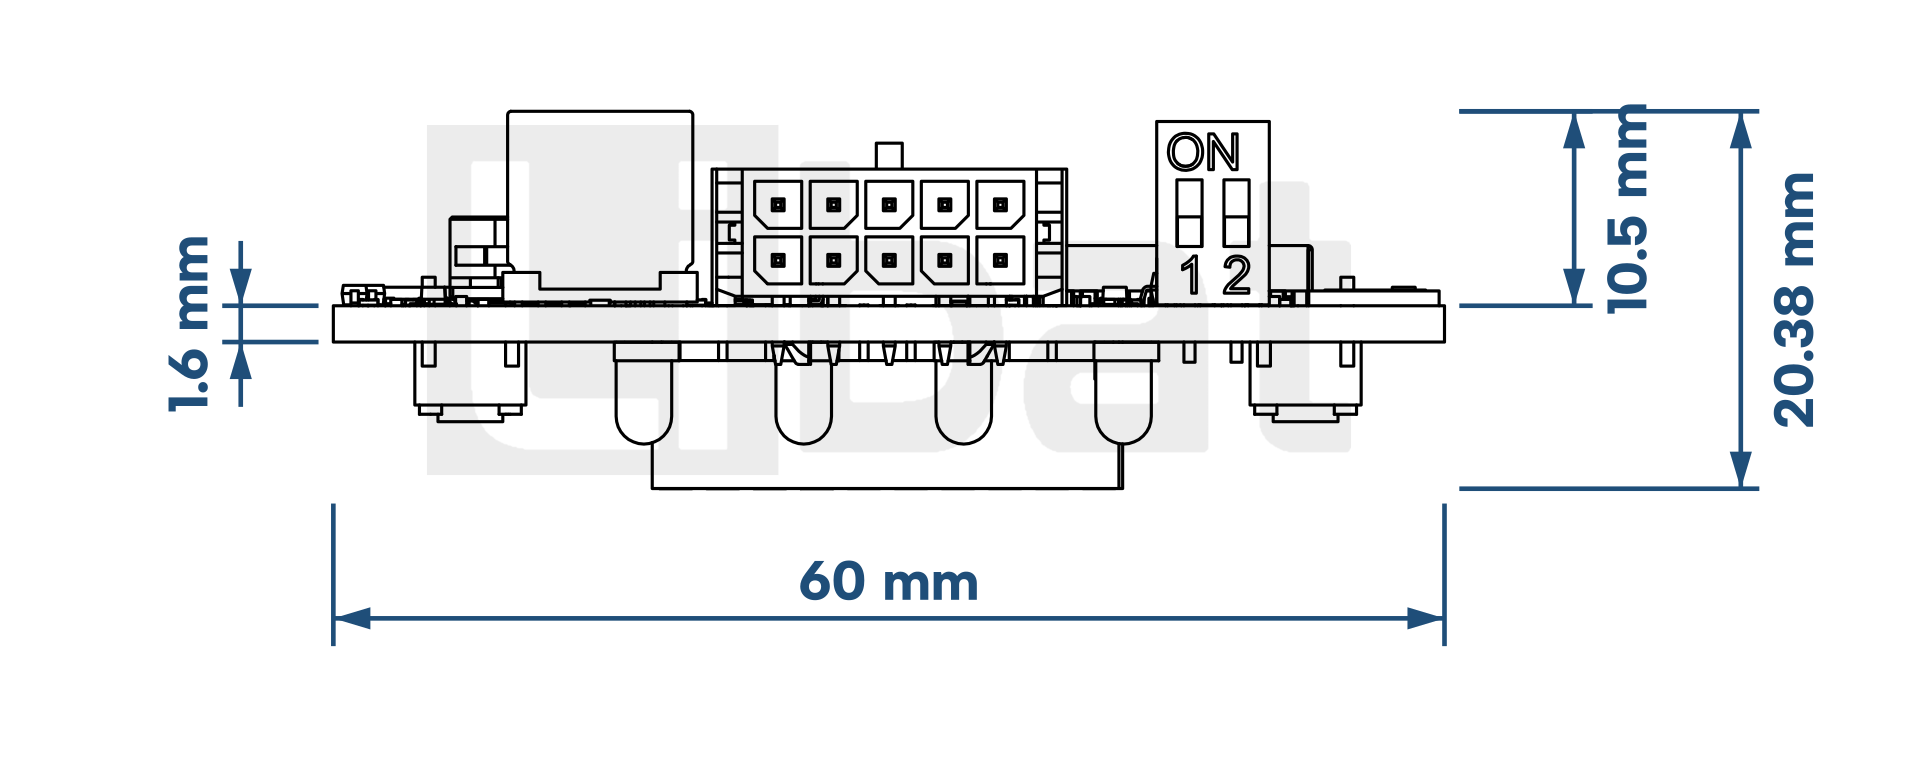
Table.5.1: Mounting Holes
| Hole | X (mm) | Y (mm) | Diameter (mm) |
|---|---|---|---|
| H1 | 4.5 | 55.5 | 4.2 |
| H2 | 4.5 | 4.5 | 4.2 |
| H3 | 55.5 | 55.5 | 4.2 |
| H4 | 55.5 | 4.5 | 4.2 |
X and Y are measured from the origin mark at the lower left corner of the board in Fig.5.1.
Enclosure
DIS110-E comes in an enclosure of 77.5 mm X 77.5 mm X 26.5 mm with two panel mounting brackets; the LED bar, the status LEDs and the two buttons stay on its front.
Danger
Take care not to damage the components on the board with mounting tools. A tool of the wrong size can damage the board permanently.