5. DIS700 Dimensions
Use the dimensions below for the mechanical design and the mounting of the DIS700-E.
Info
All dimensions are in mm unless stated otherwise.
Info
Simplified STEP or STP files are available upon request.
Fig.5.1: DIS700-E Enclosure, Front
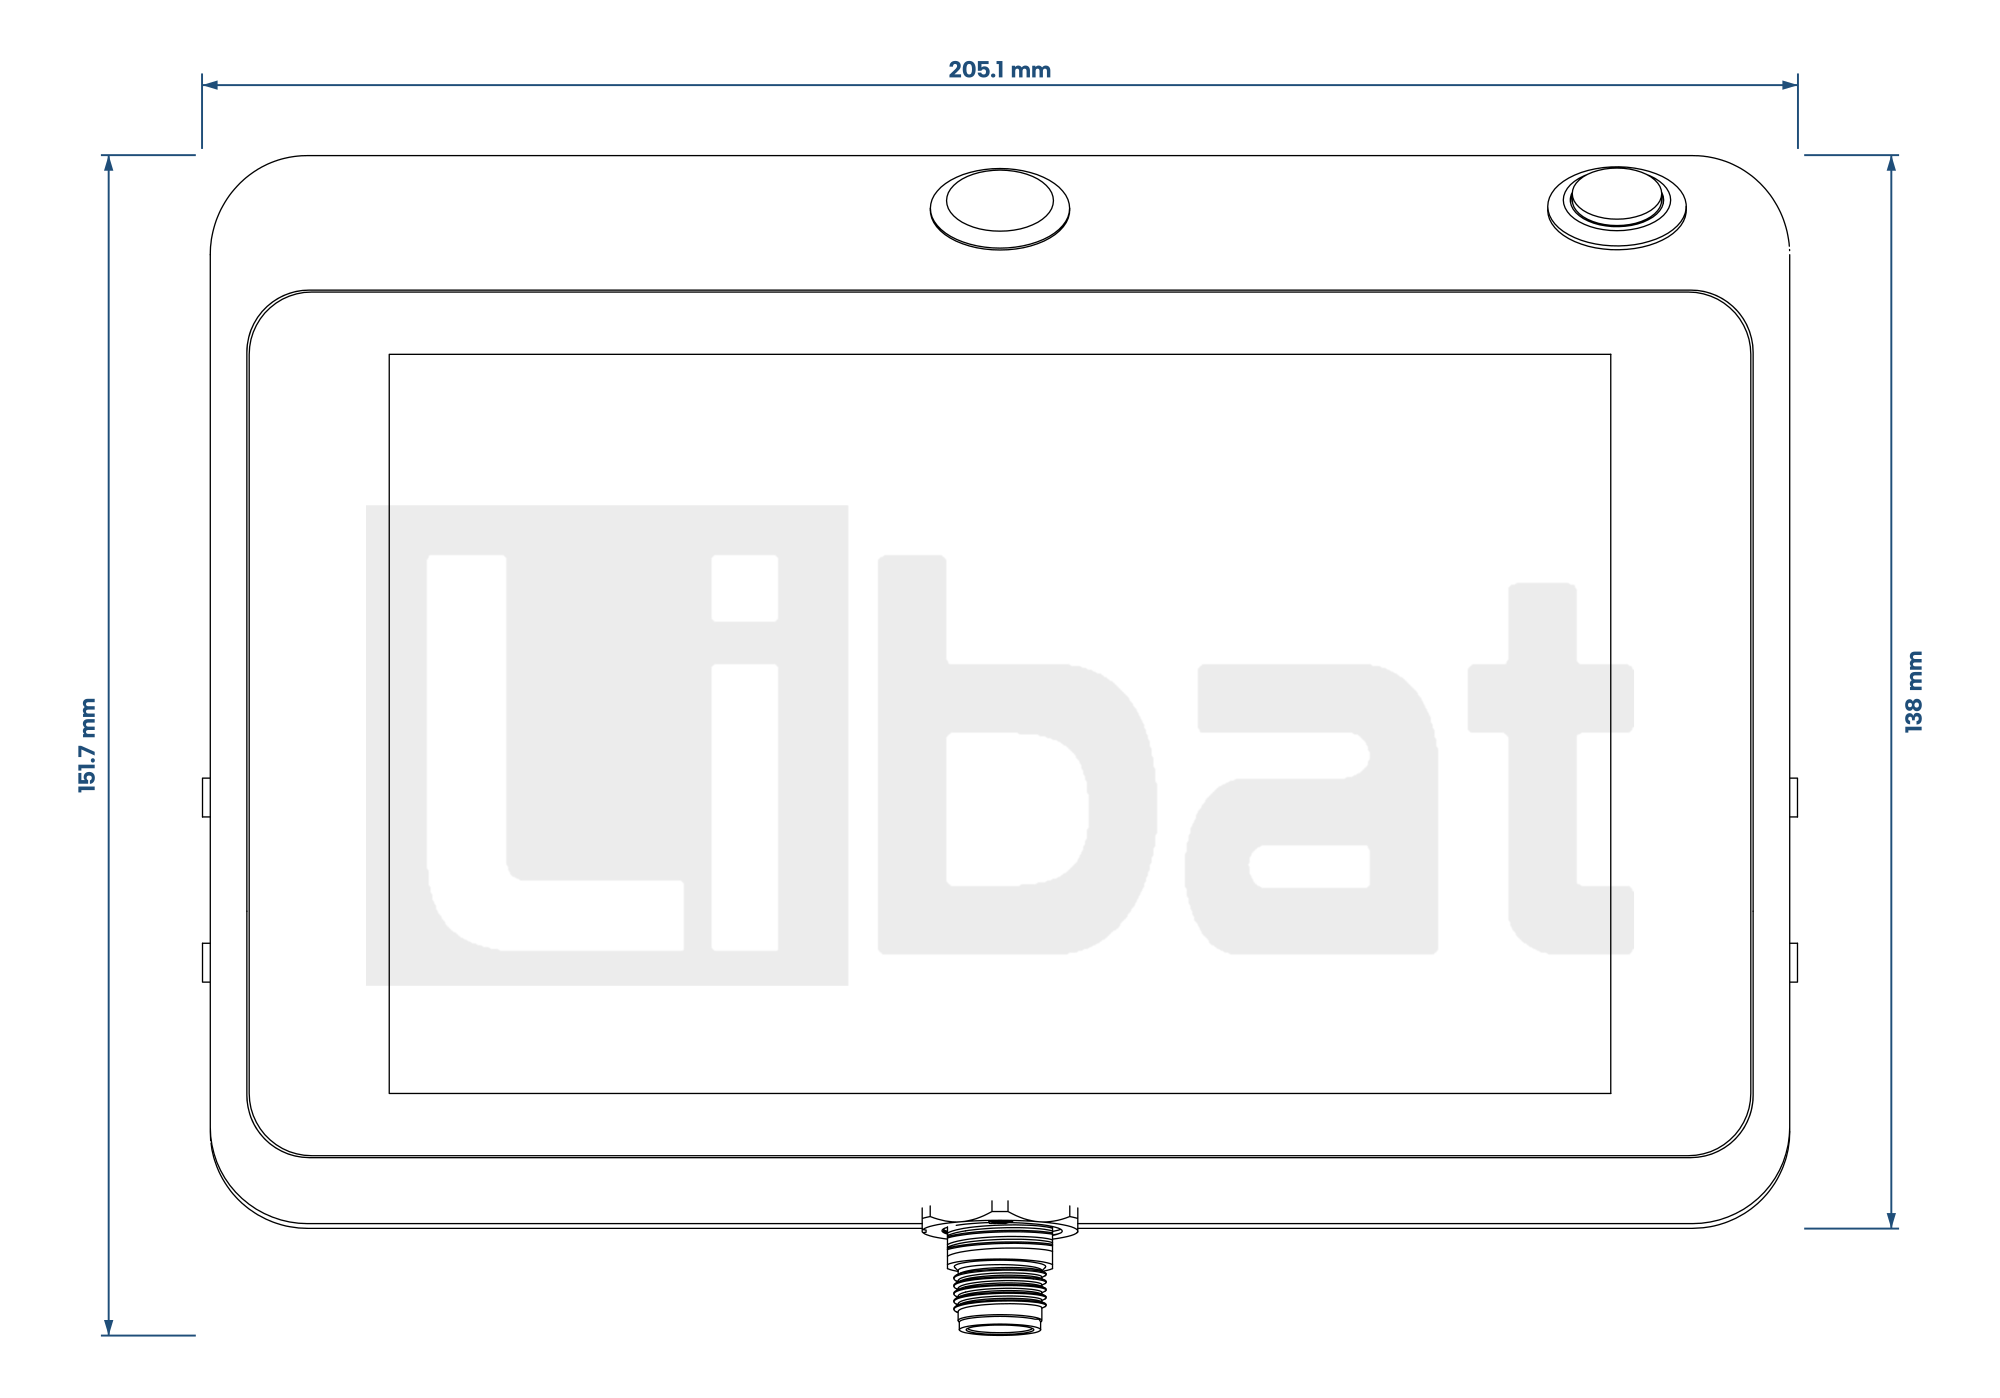
Fig.5.2: DIS700-E Enclosure, Side
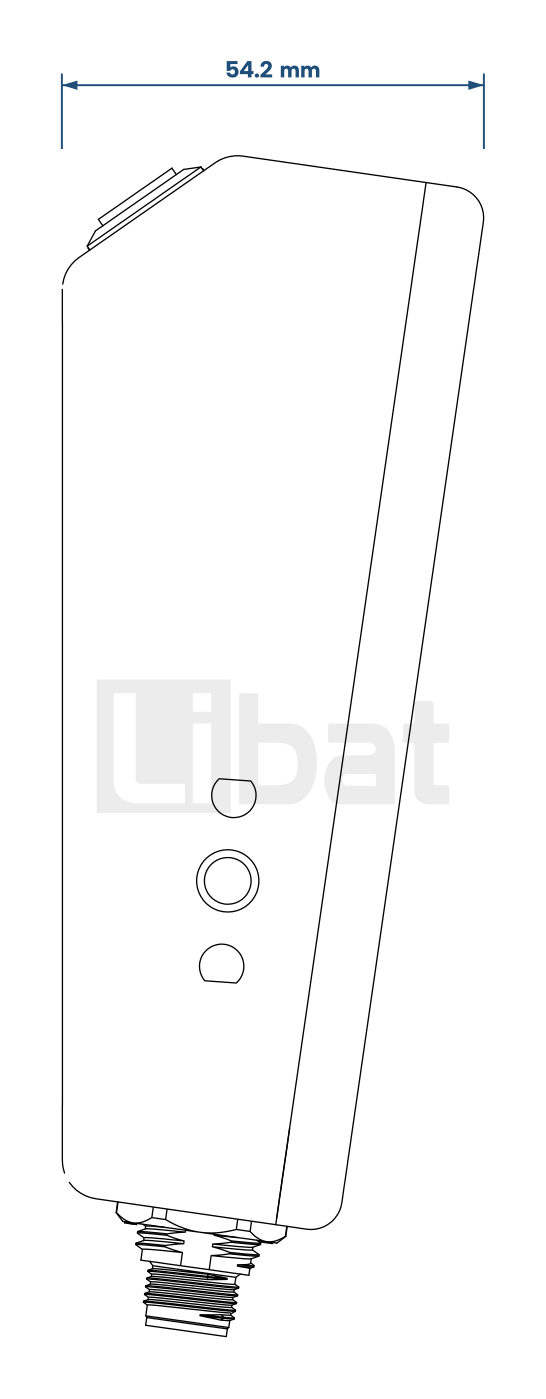
Fig.5.3: DIS700-E on its Brackets, Front
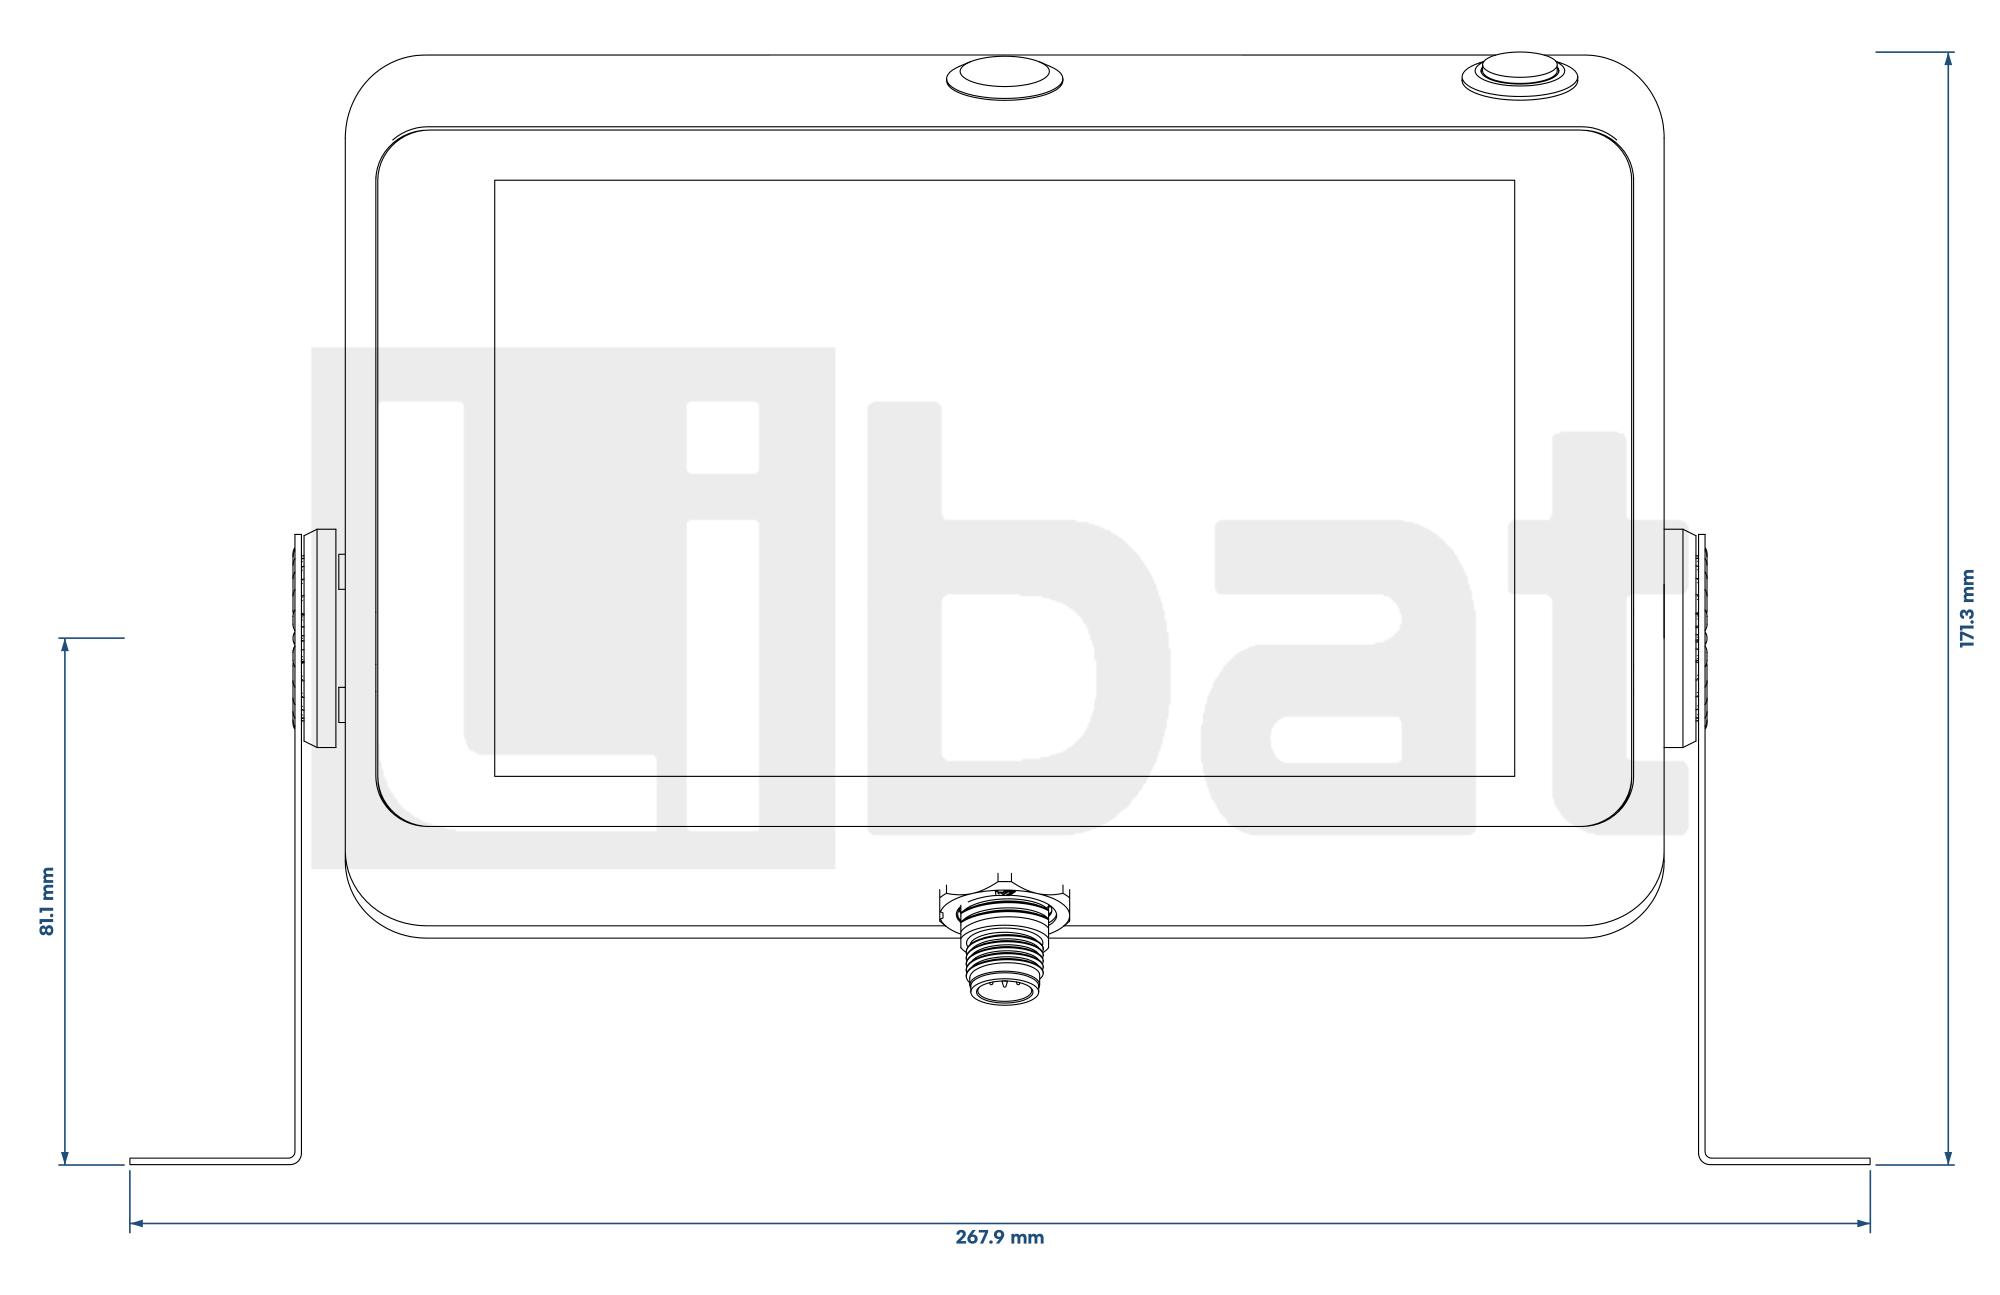
Fig.5.4: DIS700-E on its Brackets, Side
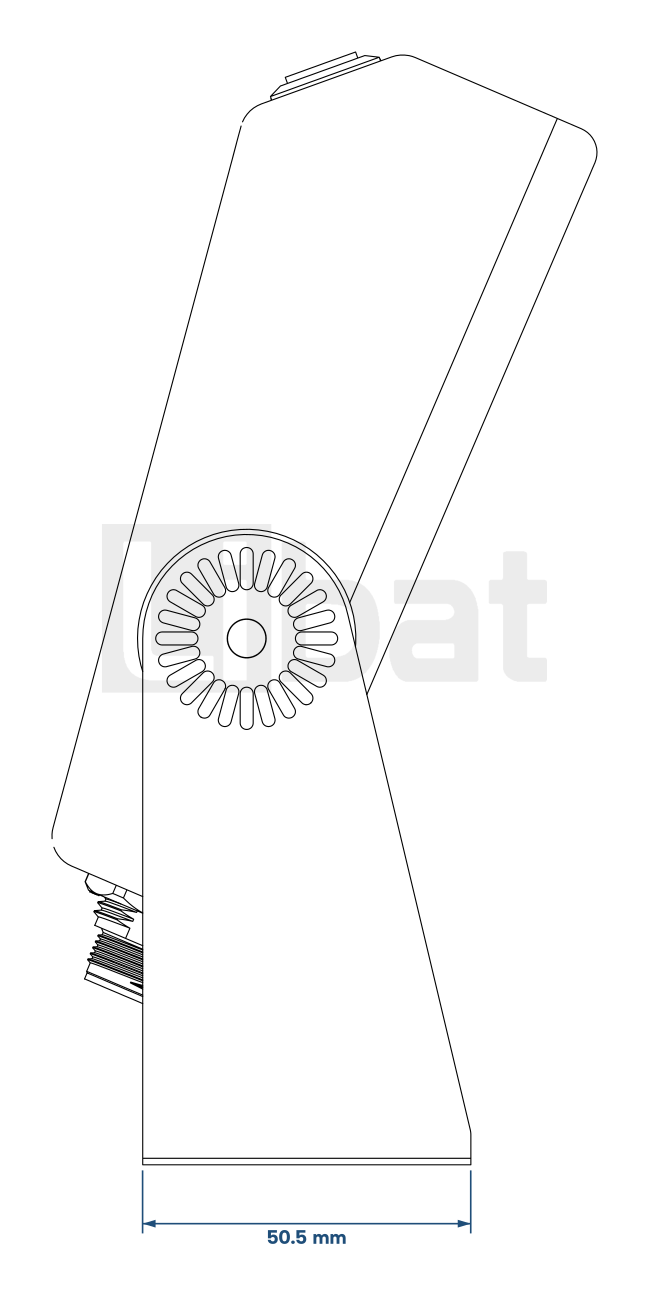
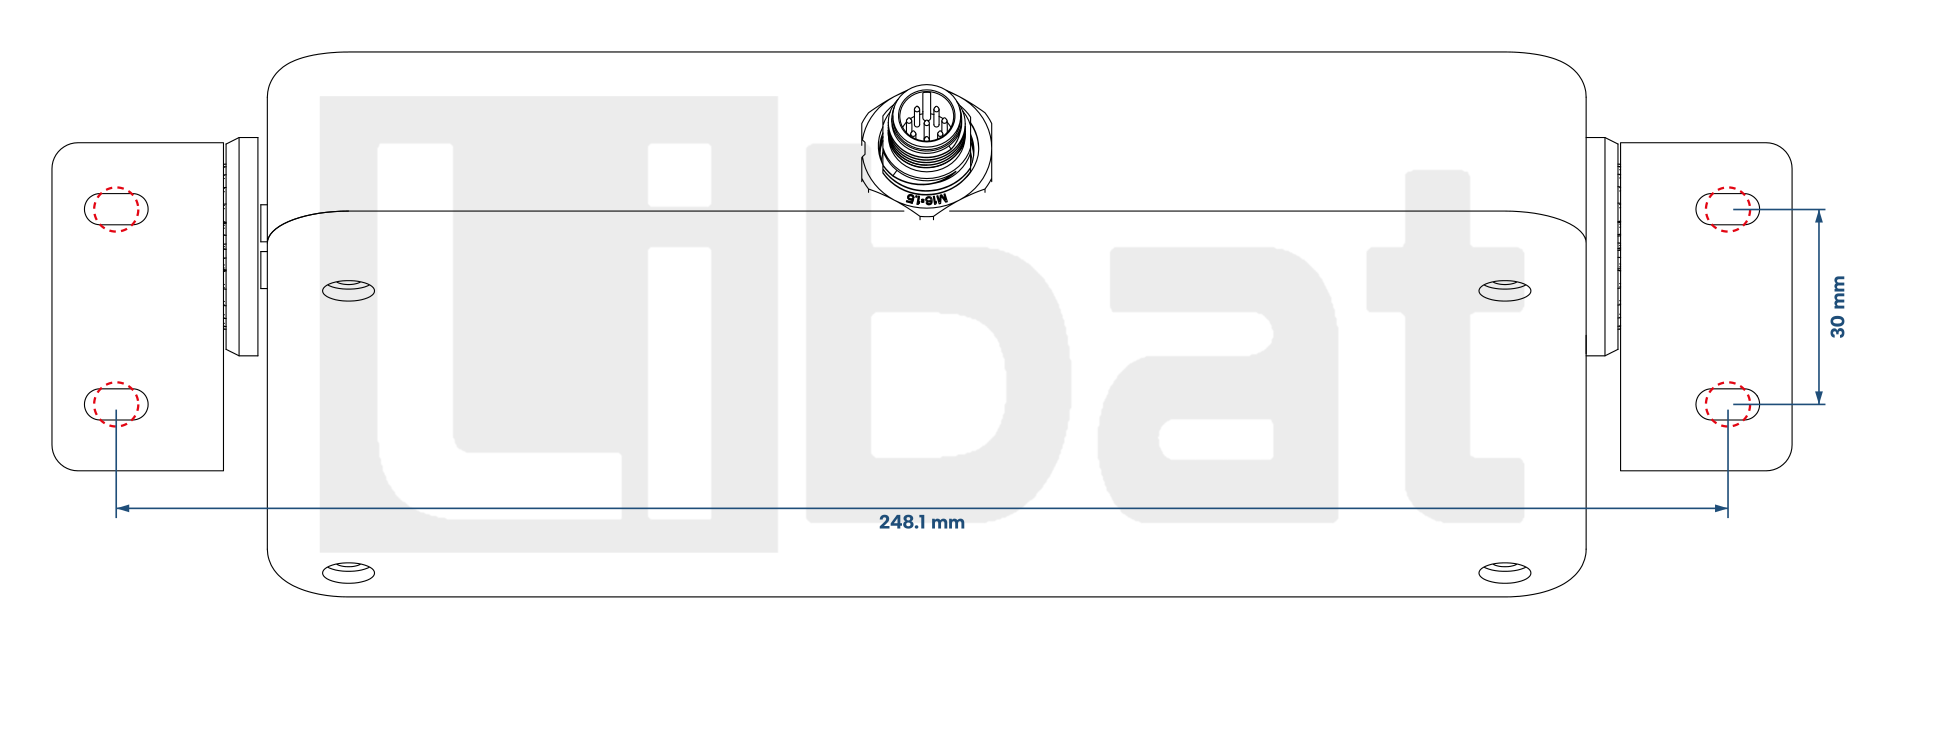
Fig.5.5: Bracket Feet, from Below
Viewing Angle
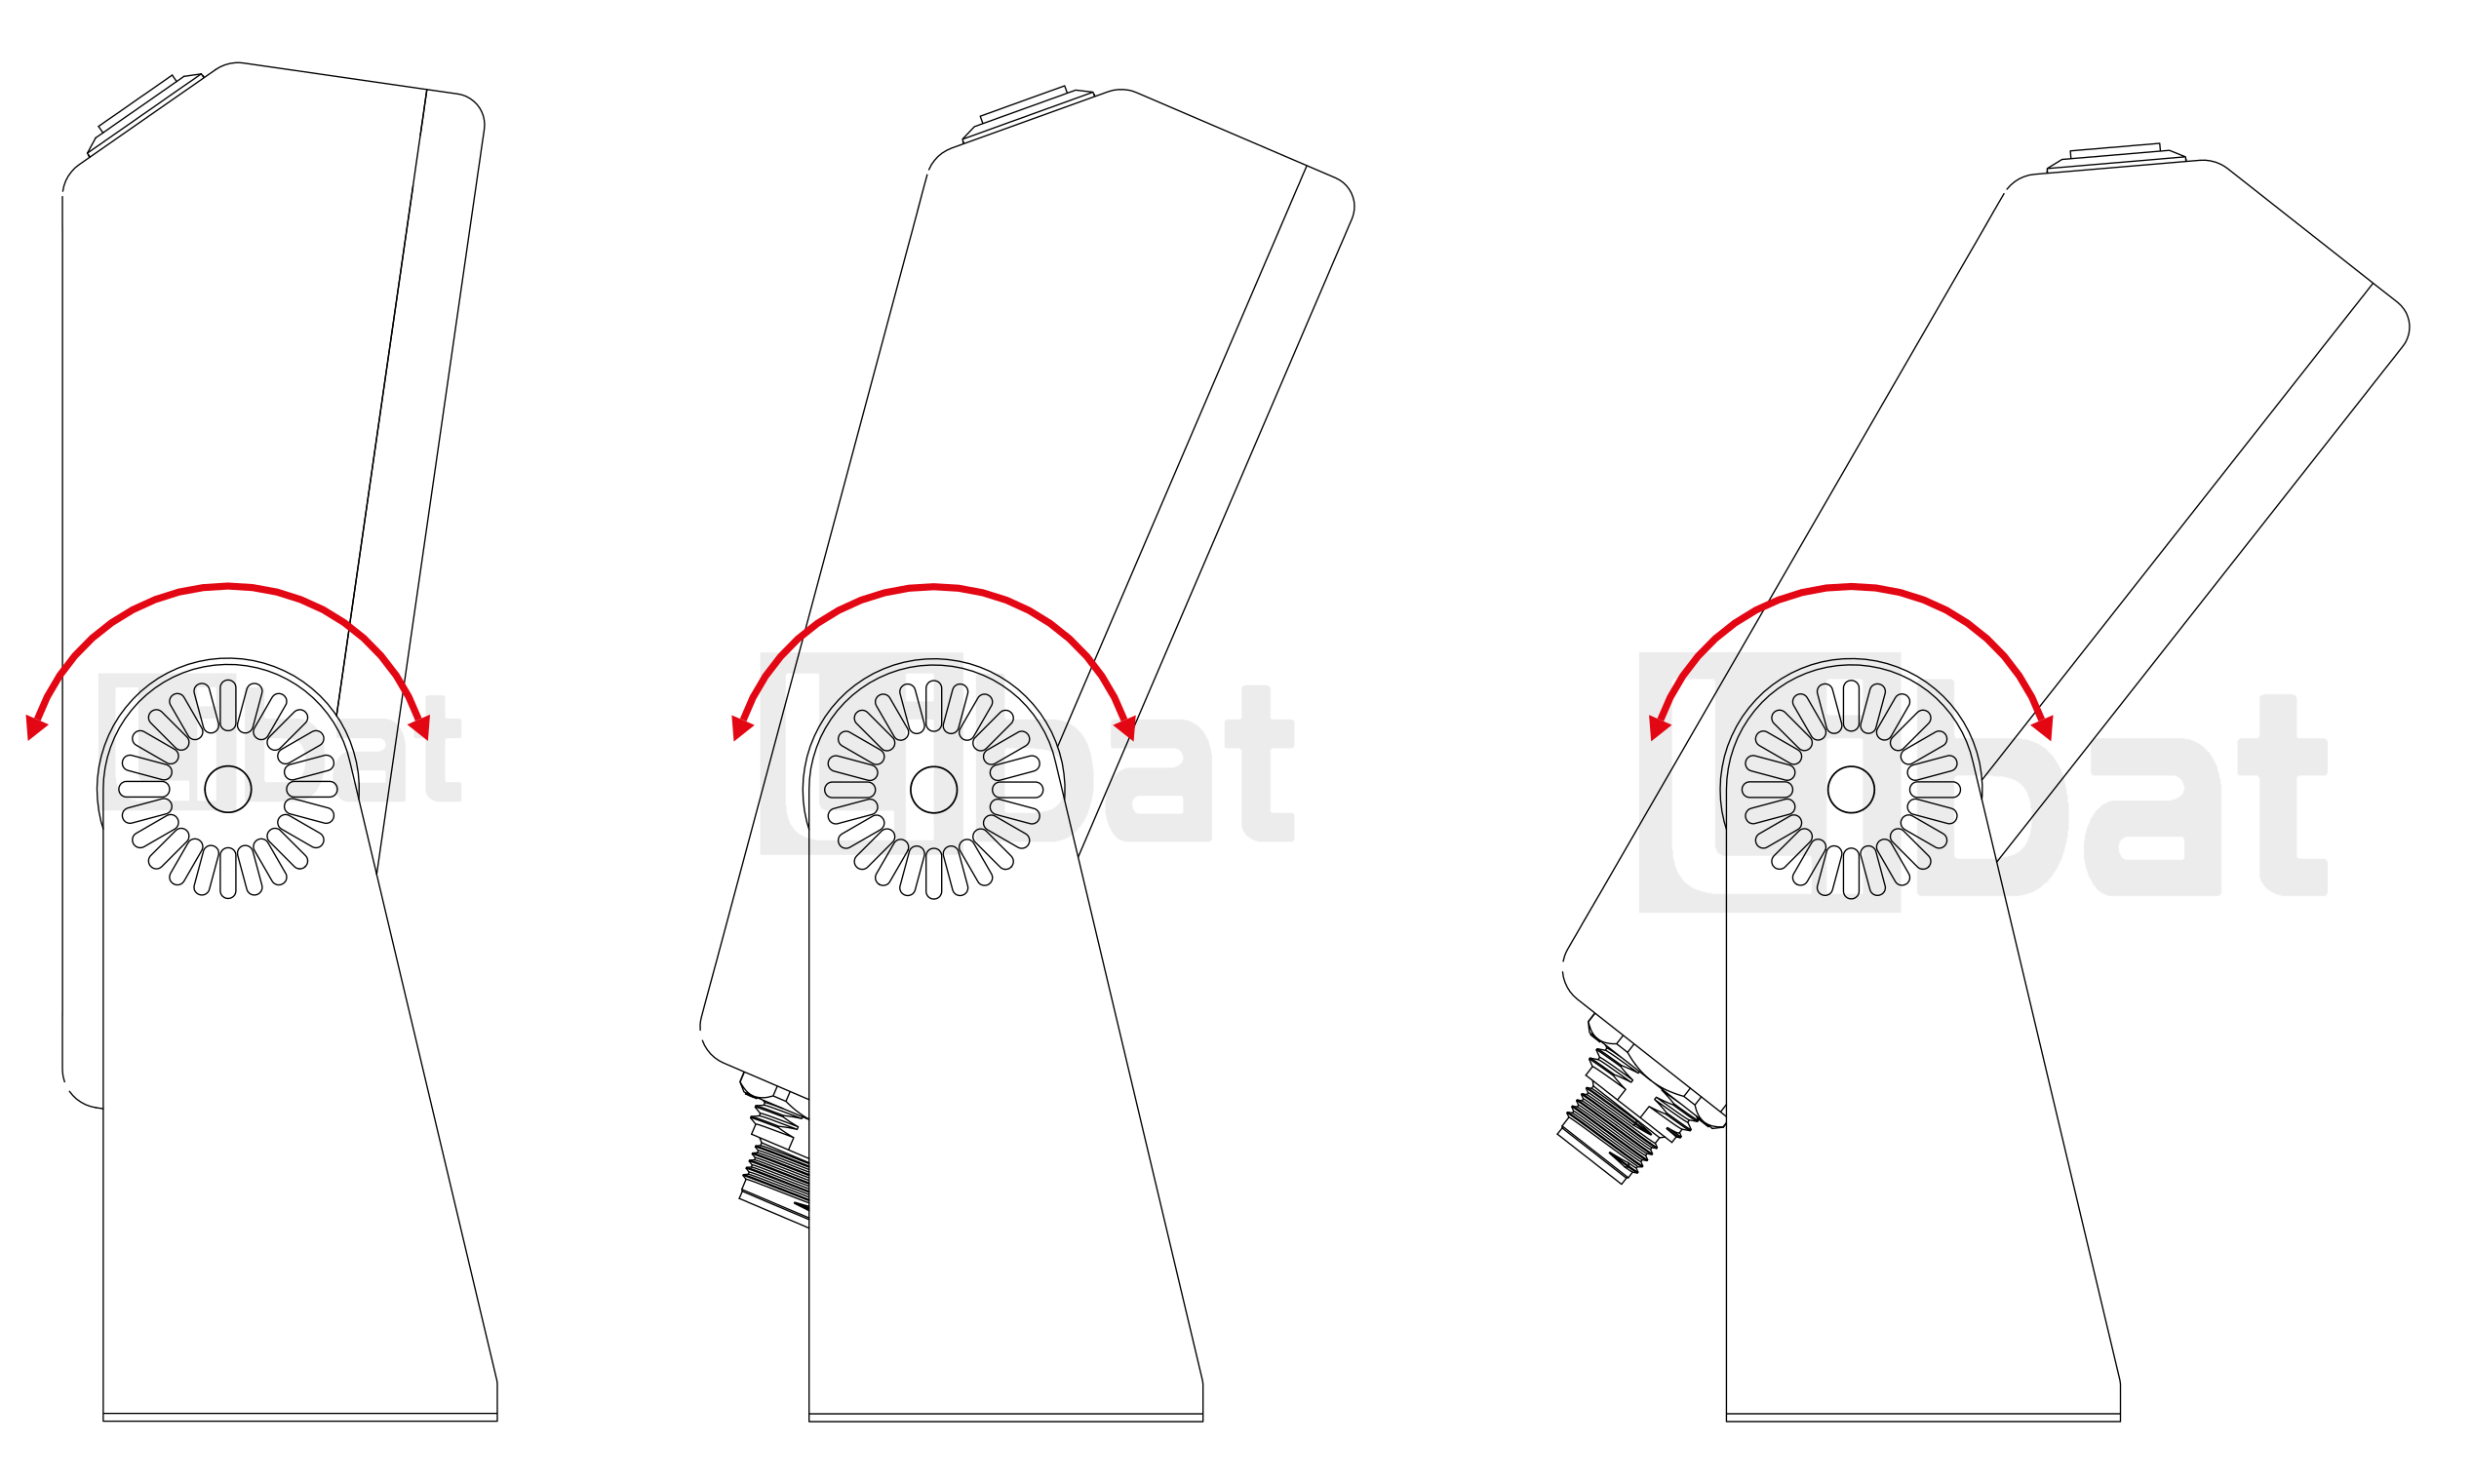
The brackets of the DIS700-E are not fixed: the enclosure turns on their two pivots, so it can be set to whatever angle suits the place, upright on a wall, leaning back on a desk or a dashboard. Loosen the two pivots, tilt the enclosure to the angle you want and tighten them again; the toothed discs at the pivots hold it there. Fig.5.6 shows three examples; Fig.5.3 and Fig.5.4 show it leaning back by 15 degrees, so the overall height and depth change with the angle.
Fig.5.6: Viewing Angle on the Rotating Brackets
Info
Each foot has two slots for the screws, 4.8 mm wide and 9.8 mm long (their ends 5 mm apart), so the DIS700-E can be moved a little sideways before the screws are tightened.
Warning
Leave room below the DIS700 for the cable connector and its cable, and keep the cable away from sharp edges and moving parts.